On the Modify on-site list page, the options for changing the display are:
Caption — a text box to enter a new name for the On-site list
List style — a drop-down list with four list styles:
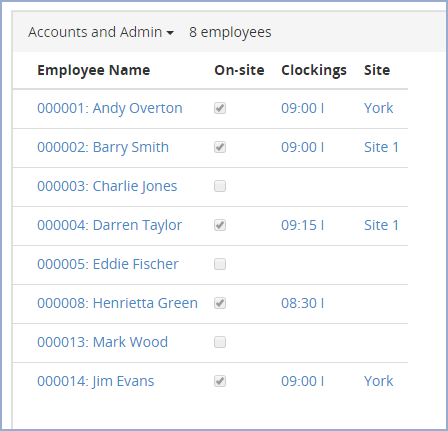
Default — a grid format with one row per Employee. For example:
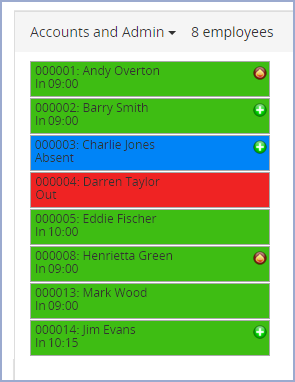
Small — a simpler visual display that is coloured to reflect each Employee's On-site status. In the following example, green is used for 'In', red is used for 'Out' and blue is used for 'Absent':
Key pieces of information are displayed such as the skill icon representing important skills and the time of their last clocking.
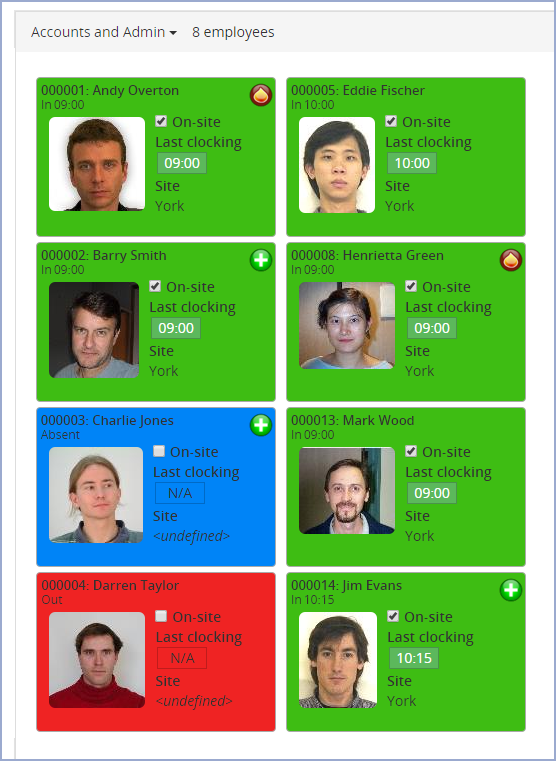
ID Card — a visual display which includes the Employee picture. The same key information is used and is highlighted to show whether someone is clocked in or out.
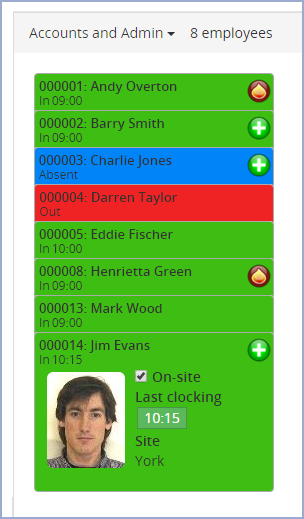
Card deck — the same as 'ID Card' but the Employees are stacked on top of each other, with only the Employees name, skill image and 'In', 'Out' or 'Absent' status on view as a tab:Hovering over an Employee with the mouse cursor brings up the 'ID Card' of that Employee. Note: clicking on any of the information about an Employee will open the On-sitedetails pop-up with further information about them.
Type — display Employees based on three clocking types: T&A in, On-site and safe
Fields — select the columns and column order displayed in the 'default' list style. The available columns depend on your permissions. The possible columns are:
Absence — displays the Absence codes for Employees who are absent
Absence return date — displays the recorded return date for an Employee with an authorised absence
Absent — displays a check-box which is selected for absent Employees
Access Point — displays the reference number or name of the access control terminal last used by the Employee
Access Time — displays the time and direction of the Employee's T&A most recent clockings at the Access Point
At Work — displays a check-box which is selected for Employees who have clocked in. This includes all mobile and web clockings
Clockings — displays any unprocessed clockings made by the Employee
Clocking time — displays the last clocking made by the Employee
Department -- displayes the department the Employee is assigned to
Name - The T&A identifier for the Employee. The actual details displayed will depend on format selected in the Employee tab in System preferences.
Known by — displays the Employees preferred name
Location — the reference number or name of the terminal where the Employee made their most recent clocking. Terminal '0' represents a web clocking
On-site — displays a check-box which is selected for Employees who have clocked in using a terminal
On-site site — displays the name of the selected Site where the Employee has made an On-site clocking, i.e. where the Employee has clocked in
Personnel ref — the unique number for the Employee on the system
Picture — the Employees picture
Safe — displays a check-box which is selected when the Employee has made a safe clocking at a terminal
Safe Position — the reference number or name of the terminal where the Employee has made a safe clocking
Safe Site — the name of the Site where the Employee has made a safe clocking at a terminal
Safe Time — the time the Employee made a clocking at a Safe Site
Site — the name of the site the Employee is assigned to
Skills — displays a list of any skills the Employee has. For example, F/AID for a First aid qualification
Skill image 1 — displays an icon representing a particular skill. Icons are added manually to the images folder in your T&A application by your system administrator or T&A Implementer. You can have multiple Skill image columns numbered sequentially, with each representing a different skill
Surname — displays the Employees surname
Note: the Safe, Safe Position, Safe Site and Safe Time are only relevant if you have a terminal configured for 'Safe' clockings. This is set up by a T&A Implementer when your system is installed.
Group by — define how Employees are sorted and displayed by group in the list. You can select from ten group options for your On-site list.
Show pictures in lists — select the check-box to show the Employees picture in the On-site details pop-up and in the ID Card and Card deck styles.
Selections options
On the Modify on-site list page, the options for selection are:
Mode — defines which Employees are included in each individual On-site list. The possible modes are:
On-site — select this mode to display only Employees who have clocked in using a terminal
Off-site — select this mode to display only Employees who have not clocked in using a terminal. This will include Employees who have clocked out, Employees who have clocked in remotely using T&A for Mobile and any absent Employees
Safe — select this mode to display only Employees who have either made a safe clocking e.g. at a different site, or who have clocked out or are absent
Not Safe — select this mode to display only Employees who have clocked in using a terminal
At Work — select this mode to display only Employees who have clocked in
Not at work — select this mode to display only Employees who have not clocked in
Absent — select this mode to display only Employees who are absent from work
All employees — select this mode to display all of your selected Employees
Exclude booked absences — select this check-box to exclude Employees from the On-site list who are ’out’ with a pre-booked absence
Employee selection — opens the Employee selection page to define a range of Employees to be selected for the On-site list. See Selecting employees for more details
Filter active — select the check-box to apply the active filters set in the Modify filter page for the On-site list
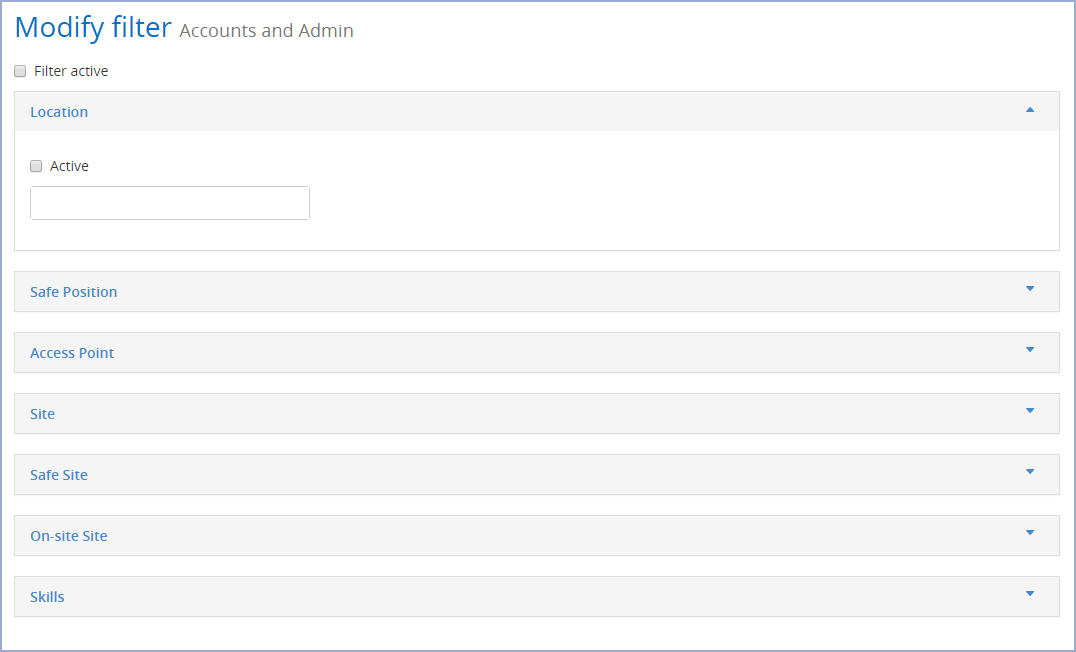
Filter — apply different filters to Employees so that only those who meet specific selection criteria are displayed in the On-site list. For example, you can use filters to display only Employees who are registered as possessing certain skills such as first aid practitioners. Click Filter to open the Modify filter page:
Location — click in the drop-down list to select a clocking terminal(s). Only Employees who have clocked using the selected terminal(s) will be displayed in the On-site list
Safe position — click in the drop-down list to select a clocking terminal(s). Only Employees who have made a 'Safe' clocking using a selected terminal will be displayed in the On-site list. The Safe position filter is only relevant if you have a terminal configured for 'Safe' clockings. This is set up by a Advanced Implementer when your system is installed
Access point — click in the drop-down list to select an access control terminal(s). Only Employees who have used a selected access control terminal, for example to clock in or enter a controlled area, will be displayed in the On-site list
Site — click in the drop-down list to select a site(s). For example, when your organisation is spread over multiple locations. Only Employees who are assigned to the selected site(s) in their Employee details will be displayed in the On-site list
Safe Site — click in the drop-down list to select a safe site(s). Only Employees who have made a clocking using a terminal at a selected location will be displayed in the On-site list. For example, in the case of an evacuation of a site, Employees who have made a clocking at a different site are considered to be 'Safe'
On-site Site — click in the drop-down list to select a site(s). Only Employees who have made clockings using a terminal at a selected site will be displayed in the On-site list. For example, you may have a mobile workforce using T&A for Mobile to make remote clockings, this filter can be used to exclude such Employees from the On-site list. Employees who make clockings by email or SMS will also be excluded
Skills — click in the drop-down list to select a skill(s). Only Employees who have the selected skill(s) will be included in the On-site list
Note: Select the Active check-box against the filters you wish to apply, then select the Filter active check-box at the top of the page to apply selected filters. To remove a filter, de-select the appropriate check-box. Click Submit to save your filter options and return to the On-site list which is refreshed with your filters applied.
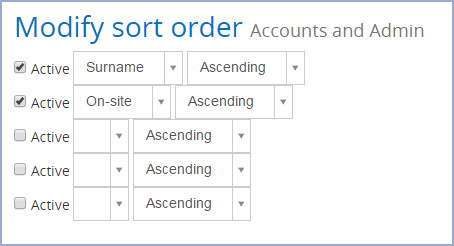
Sort — To apply sort options to an On-site list, click Sort to open the Modify Sort Order page:
Two sort options have been selected in the previous example, to sort the list by Surname followed by On-site, all 'Ascending'
To add or change a sort option, click on one of the left-hand drop-down lists and select an available option. Also select either 'Ascending' or 'Descending' from the relevant right-hand drop-down list. Select the check-box to the left of the drop-down list then click Submit to save your selection(s) and close the page. The On-site list refreshes with your sort options applied